Pouring a Foundation
After selecting a contractor, there are 7 key steps to pouring a foundation:
(click each item for detailed description)
We generally allow for 4-5 days to complete your foundation.
Please note that several steps to pouring a foundation take place on the same day.
Weather may play a role in determining the total length of a job.
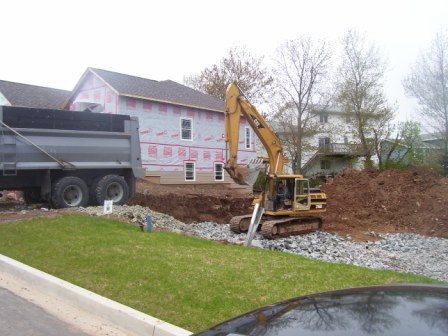
The hole is dug using an excavator. If you have not already hired a excavator, we will recommend a excavator who we have worked with in the past. The hole must be bigger than the area of the foundation in order to accommodate the workers who will be pouring your foundation.
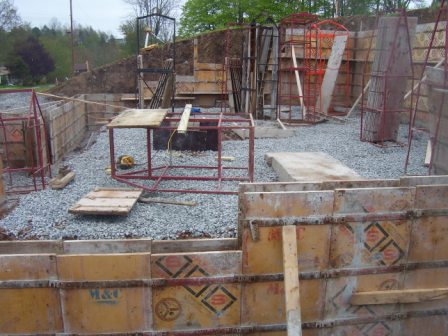
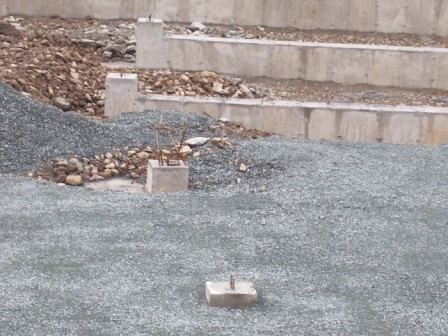
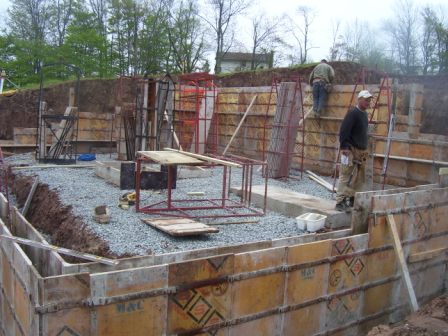
The footings are created using forms, place on undisturbed ground. The footing is always wider than the concrete walls. Also a number of smaller footings to support various posts inside the home are also usually poured at this time.
The footings receive the load of the house through the load-bearing walls and posts. The type and size of footing is based on a number of factors including soil conditions, size of the house and slope of the site. There are three kinds of footings:
wall, column and stepped. Wall footings support walls. Column footings support posts which in turn support beams that support floors for instance. On steeply sloped sites, steeped footings are used to keep the footing
Day 3: Pour the Concrete Walls
Before we pour the walls, we will strip the footings – this means that we will remove the forms, now that the concrete foots have dried and cured, Like the footings, forms are used for poured concrete walls. M&C Foundation Forming uses Resi-ply forms from R. Desilets Concrete Forms and Accessories. We are also a Dealer and Distributor for R. Desilets, providing Concrete Forms and Accessories to our industry partners throughout Atlantic Canada.
Day 4: Stripping Walls, Waterproofing, Installation of Drainage Pipe
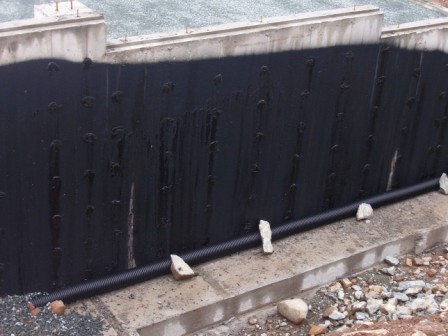
Again the forms are taken off and the concrete walls are cured before the next step. After stripping your wall, we will apply a vital part of your foundation: Waterproofing.
Waterproofing must not be confused with Damproofing. Whereas Damproofing will aid in reducing moisture from penetrating your walls and foundation, Water Proofing completely retracts water, thus eliminating any water from seeping into your walls or
foundations. The application of this product produces a thick sticky tar-like substance, which cures and acts as an impenetrable membrane, ensuring a dry basement for many, many years to come.We use Tremco Products – specifically Tuff n Dri
and Watchdog systems. For more information, please visit our section on Waterproofing.
There are several different terms for this process, but they all mean the same thing, and Installing the drainage tile is absolutely essential to maintaining a dry foundation. This “weeping tile” draws water away from the foundation,
and ensures that any water that seeps into the soil will drain away from the foundation, thus preventing moisture or water damage to your basement.
Day 5 (If necessary): Pouring Concrete Floor and Backfilling Around Foundation
You’re almost finished building the base of your home!
After the drainage pipe has been installed and the waterproofing system has been applied, the concrete floor is poured.
In the days that follow, several other steps will take place in the construction of your new home, leading to the installation of the subfloor. Once the installation of this subfloor has been completed, the area around your foundation will be backfilled.
The soil that is put back is graded such that it slopes away from the foundation, again to ensure water flows away from the wall. This is the last stage of constructing your foundation and basement.
If the idea of building a new home from the ground up terrifies you, just imagine: Before long, you will be sitting in your dry, cozy rec room, watching the Stanley Cup Finals while the blizzard rages on outside your window, and all of your hard
work, building the home of your dreams, will have paid off!!
